Configuration Steps
This guide explains how to configure your KAMI AI plugin for successful use on your WordPress site.
The plugin setup involves entering an API key, selecting an AI model, adjusting text generation settings, testing the connection, and saving the changes.
Access the Settings
In your WordPress dashboard, go to KAMI AI, then click on Settings.
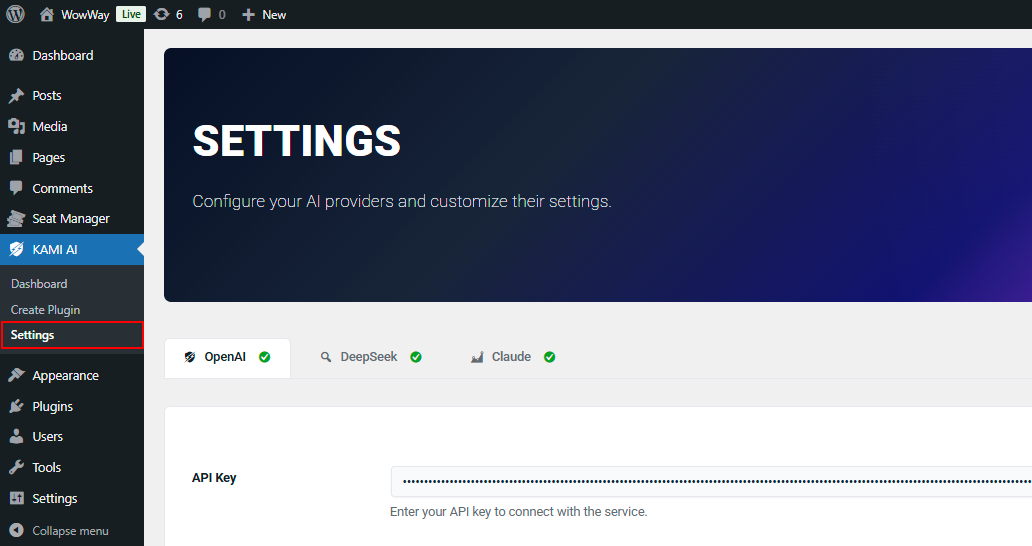
Enter the API Key
- Choose your preferred AI provider by selecting it from one of the tabs.
- In the API Key field, enter the API key provided by your AI service.
- Click Test Connection to check if the API key is correct.
You can configure all the providers, of course.

This key is essential to establish a connection with the AI provider.
First step is to generate an API Key.
Here are the links where you can create your account and generate API key :
Please Note:
OpenAI, Deepseek and Anthropic are NOT FREE and are using paid services, and you will need to enter your credit card details to use them. We are not affiliated with them or their payment system. For any questions or issues related to payments and billing, please contact their supports directly.
Select the AI Model
- Click on Fetch Models first to download the available models.
- Click on the Model dropdown menu and choose the AI model you want to use (e.g., gpt-4o-mini).

Temperature
Move the Temperature AI Developer slider to control the level of variation in responses. This will be used to generate plugin code based on your requirements
- 0 : Highly precise and consistent responses.
- 1 : More creative and varied responses.

Set Number of Tokens
In the Max Tokens field, enter a value to limit the length of generated responses (e.g., 2000 tokens).

Save Configuration
Once all settings are defined, click Save Changes to apply them.
Ready to Start ?
Now that you have KAMI set up, learn how to create your first plugin.
Create a PluginOn This Page